
The Heru Headset requires an internet connection. This article explains the steps to connect your Heru Headset to WiFi.
🔎 Powering on your Heru Headset:
- To power on your Heru Headset, hold the Power Button on the light pack for 3 seconds.
- To power on your controller, hold the Home Button on the controller for 3 seconds. You will feel a slight vibration when the controller powers on.
- Place Heru Headset on your head. You will see a red Magic Leap logo on the display for 20 seconds. Once the device is ready, you will see the Magic Leap introduction screen.
- Using the controller, point to the 'Tap to Continue' prompt, and press the Trigger Button with your finger.
- After selecting 'Tap to Continue', the next screen will prompt you to set up a spatial map. DO NOT set up the spatial map. Instead, select the 'Skip' option to proceed to the home screen.
🔎 Navigate to Settings:
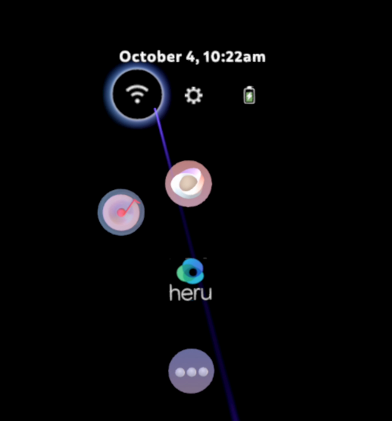
- On the Magic Leap home screen, select the Wi-Fi icon as shown below, using the Trigger Button on the controller.
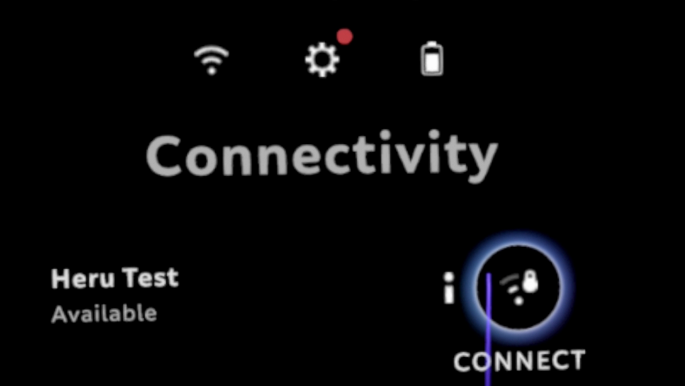
- Select the Wi-Fi network you would like to use by pointing to the 'Connect' icon shown below.
- Enter your WiFi password, if necessary.
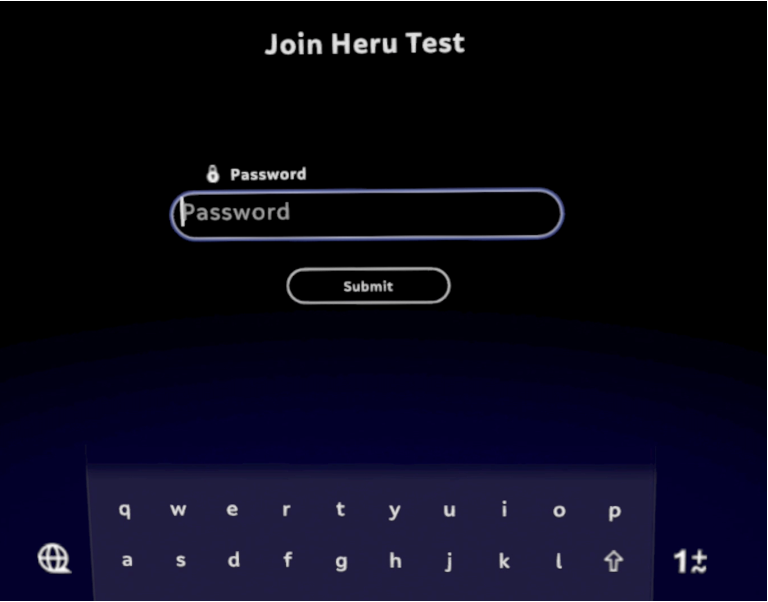
- Point to the 'Submit' icon and press the Trigger Button with your finger.

- Once the network connection has been established, you will see a notification on your display that says “Internet Connected”.

💬 After connecting to WiFi successfully, tap the Home Button on the controller twice to navigate back to the home screen, where you will find the Heru app.
📞 If you have any trouble connecting your Heru Device to WiFi, please contact Heru Support at 1-844-SEE-HERU for assistance.