
This article will show how to perform a Dark Adaptation test.
Getting Started
-
Make sure the headset is charged.
-
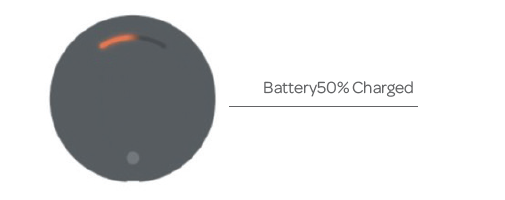
Extended Dark Adaptation: Make sure there is at least 50% battery on the headset and the controller before running the test. The Dark Adaptation Accessory is not designed to run the test while it is actively charging.
-
-
Ensure Bluetooth is turned on through the MagicLeap settings.
-
Conduct the test in a room that can have the lights on and off or dim.
-
First part of the test will be conducted with the lights on.
-
Will dim the lights after the flash/bleach is administered.
-
-
Ensure the Dark Adaptation Accessory is properly attached by ensuring the light shield is not blocking any of the sensors.
-
Insert the distance spherical equivalent trial lenses in both eyes – not just the eye being tested.
-
Spherical Equivalent = (Cylinder/2) + Sphere
-
-
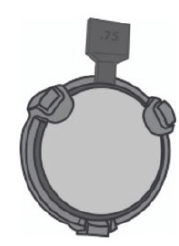
Attach the neutral density filter (NDF) attachment to the trial lens of only the eye that will be tested. When inserting the trial lens and NDF attachment in the headset, the NDF should be oriented so that it is on the side closest to the screen (not the patient’s eye).
-
If no prescription is needed on the tested eye, you may attach it to a plano or a -0.25 DS trial lens.
-
The NDF attachment should not be used in other tests.
-
If multiple tests are selected within an appointment, Dark Adaptation will always be the last test.
-
NDF attached to trial lens:
-
Testing
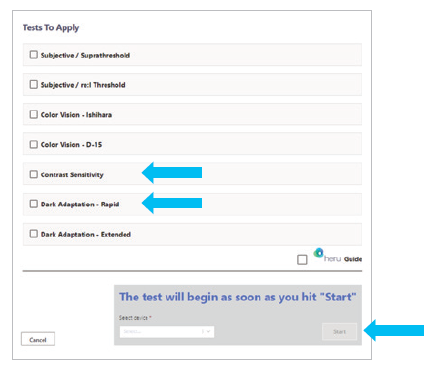
- Select the Dark Adaptation test in the portal. Select the test type, test eye, and the device and click “Start”.
- At the start of the test, make sure the room lights are on. If the lights are off or too dim, the patient will have a hard time seeing the laser pointer.
- Follow the instructions on the Exam View within the portal.
- The headset will automatically connect to the accessory. This may take up to 15 seconds.
- Once the connection is made, the system will perform eye tracking calibration.
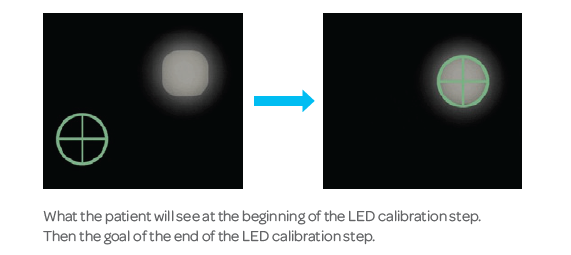
- After the demo, the patient will go through the LED calibration. A dim stationary light will appear, and the patient will be instructed to use the controller to move the green crosshairs over this light and select “Click Here to Continue” at the bottom of the screen. Alternatively, the operator may click the “Patient Done Calibrating” button on the portal to advance to the next step.
-
Once the calibration is complete, dim the room lights. After confirming the patient is looking at the fixation target, click “Ready to Flash”.
-
Move quickly in this step to maximize the accuracy of the flash/bleach.
-
To conduct reliable tests, it is recommended to restart the test if there are any concerns about improper alignment for any reason.
-
-
The test will begin after the flash/bleach has been administered.
-
During the test, the patient should focus on the fixation target and click the bumper each time they see a faint light appear below.
-
It is normal for the patient to not see anything for the first 45-60 seconds because their eyes are still adjusting. If you do not see them clicking after one minute, review the instructions again to make sure the patient understood the directions.
-
Patients with disease may take even longer to notice these dim lights.
-
-
The test will give breaks and encouragements to the patient to keep them rested and engaged for more reliable data collection.
-
The Rapid test will end in 6 minutes and the Extended test will take 20 minutes. If the test needs to be cancelled at any point, the operator may click “Cancel” on the Exam View. A report will be generated depending on how much data was collected prior to test being cancelled.
-
Once the test ends, turn on the lights and remove the headset.
Troubleshooting Tips
- During the LED Calibration step, if the patient struggles to see the laser pointer from their controller, ensure:
- The room lights are on
- The controller is pointed straight ahead
- The patient is holding the controller in front of them, not on their side
- A “No dark adaptation accessory detected” error will be displayed if the accessory has run out of battery or is having a difficult time connecting to the headset via Bluetooth. Please charge the accessory. Please note that accessory is disabled while charging.

-
A “Flash Error” is detected when the patient’s sensitivity is above the expected level in the beginning of the test. This may happen due to incorrect fixation during the flash/bleach step. If a “Flash Error” is detected, consider restarting the test.

-
If fixation losses are noted, remind the patient to look at the fixation target. The fixation loss number will turn red if it is above 30%.

-
“No Eyes Detected” error is displayed when the headset cannot detect the patient’s pupils. Ensure the patient’s eyes are open wide during testing.

-
Cancel Button on the bottom left of the screen may be used to end the test of that individual eye.
-
Restart Button on the bottom right of the screen may be used to restart the test of that individual eye.