
This article will show you how to create a desktop shortcut directly to the portal for easier access on your computer.
Chrome Users (Windows + macOS platforms)
This method will work for users running the latest version of Google Chrome, regardless if they're using a Windows or macOS operating system.
1. Open portal.seeheru.com on Google Chrome.
2. Click on the three dots on the top right of the browser, then click “More Tools” > “Create Shortcut”.
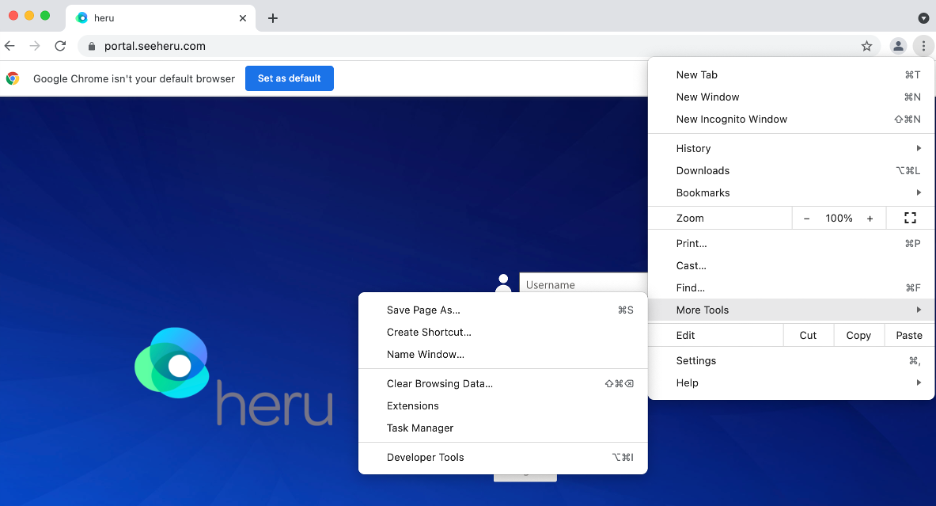
3. A small box should appear at the top of the browser, asking what you’d like to name the new shortcut. Enter “Heru Portal” and check the “Open as window” if you’d like to open the portal in a new window, instead of a new tab in your existing browser.
4. Click the “Create” button. Depending on if you clicked the “Open as window” checkmark, the portal will open in either a new window or a new tab.
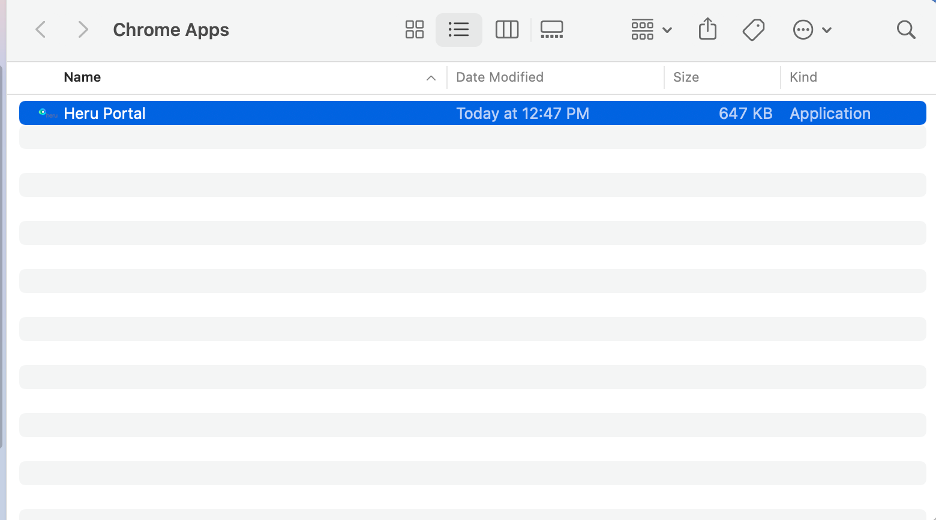
5. If you are using macOS, a new Finder window will open with the name “Chrome Apps”, and you should see the portal link inside. You can drag it to the “Applications” folder so that it will show in the Launchpad, or the Dock for easier access. If you are using Windows, the link will appear right on your desktop.
Windows:
-png.png)
Mac:
Windows users
If you are running a machine with Windows installed, you can create a shortcut without having to open a web browser. You will, however, need the .ico file for the portal; this file is available to download here. Save it to wherever is easiest for you to find on your computer; to avoid confusion, we recommend saving it to your documents. This will be needed to make the desktop icon into our logo for easier identification (and it looks a little nicer!)
1. Right-click on the desktop, then highlight New > Shortcut.
-png.png)
2. A window will pop up asking what website you'd like to create the shortcut for. Type in "https://portal.seeheru.com", and click "Next."
-png.png)
3. The window will ask what you'd like to name the shortcut; we recommend naming it "Heru" or "Heru Portal." For this example, we went with the former.
-png.png)
4. The icon will then appear on your desktop ready to go, but it will take the image of the web browser you've set as default on Windows. What we want to do is change it to the .ico file you downloaded earlier, so right-click on the icon, and select "Properties."
-png.png)
5. Go to "Web Document" and click "Change Icon."
-png.png)
6. Navigate to the .ico file you downloaded earlier, and double-click to select it. Hit "Apply", then "OK."
-png.png)
7. The portal shortcut should now look like this on your desktop. You're good to go!
-png.png)